Tazz Toy
Repairing damaged plush toys can be a rewarding experience, both for the toy and the owner. Expert Marie Thompson, a veteran toy restorer, once said, “Each repair tells a story, reflecting love and care.” This insight emphasizes the emotional value of plush toys. When learning how to repair damaged plush toys, one must focus on detail and patience.
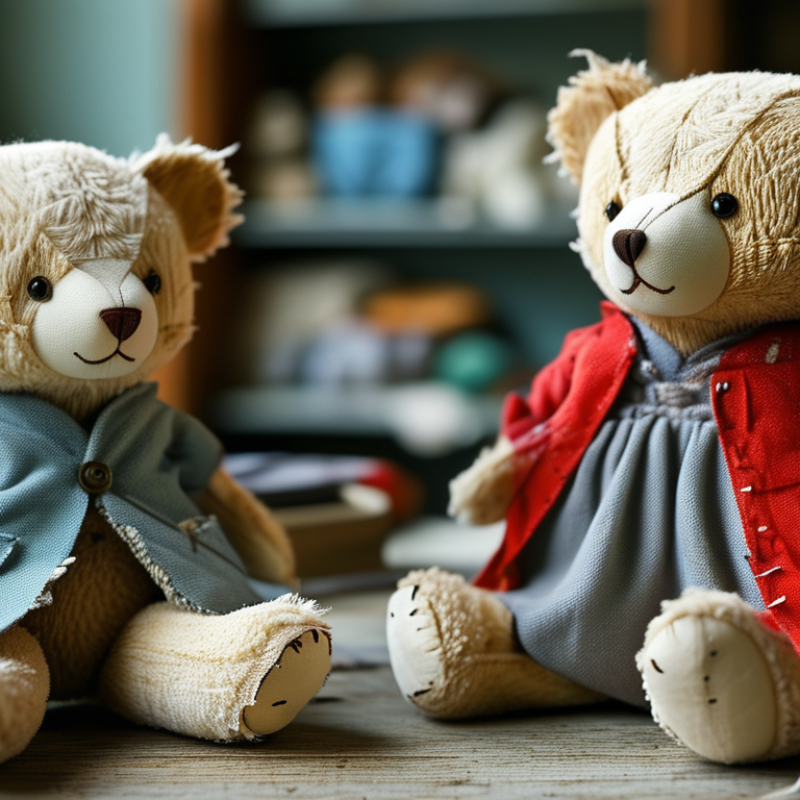
The process often involves stitching, re-stuffing, or patching holes. Imagine unraveling a plush bear, revealing its soft insides. It’s a dance of craftsmanship. Mistakes can happen, like uneven stitching or mismatched fabric. Reflecting on these imperfections can lead to growth and improved skills.
In this guide, you will discover practical steps and tips to transform a beloved plush toy back into its original glory. Embracing this challenge can not only restore a toy but also deepen your connection to it. Remember, repairing plush toys is as much about the journey as it is about the final result.
Repairing plush toys at home can be a rewarding experience. To start, gather the right materials for effective repair. You will need a sewing kit, including needles, thread, and scissors. Choose a thread color that closely matches your toy. Additionally, stuffing material, like polyester fiberfill, will be essential for restoring your toy's original shape.
You'll also benefit from fabric glue for quick fixes. Keep patches on hand, as they can cover holes or worn areas. A soft brush or lint roller can help clean the toy before repairs. Don't forget safety pins; they help hold pieces together while you sew.
While working with delicate fabrics, take your time. Mistakes can happen, but they offer learning opportunities. Every plush toy has a unique history. It's essential to reflect on its sentimental value while you revisit your repair methods. Being careful and attentive will ensure that your beloved toy can regain its charm and comfort.
When it comes to plush toys, damage is quite common. Identifying the type of damage can make repairs easier. Most plush toys suffer from tears, lost stuffing, or worn-out seams. Observing these issues helps determine the best repair method.
Small tears can be fixed easily with needle and thread. Use a matching thread color for a neater appearance. It can be tricky to sew without creating puckering. Lost stuffing is also a frequent problem. You might find your plush toy flattened. In this case, adding new stuffing will restore its shape. Just remember to avoid overstuffing to maintain the toy’s softness.
Worn seams often appear along the seams where stress occurs. They may require reinforcement with extra stitching or patching with fabric. If the eyes or other features are damaged, replacing them can give your toy a new life. While repairing, you might encounter frustration. Learning as you go is part of the process. Each attempt builds your skills and confidence.
Repairing plush toys at home can seem daunting, yet it’s a rewarding task. Sewing plush toys can breathe new life into beloved companions. Gather your materials first: a needle, thread, scissors, and stuffing. Each item is essential for a successful repair.
Begin by assessing the damage. Identify any loose seams or tears. A small hole can be fixed easily, while larger ones may require more attention. Pinch the fabric together to see how it aligns. Sometimes, you may find mismatched patterns that can be frustrating to align. Use fabric glue for small repairs if sewing feels daunting. It’s not always perfect, but it works in a pinch.
When stitching, use small, even stitches for a neat finish. Don’t rush; take your time to ensure each stitch holds. Feel free to use contrasting thread for a creative touch. It adds character, though it might not blend perfectly. Consider stuffing the toy once again if it feels flat or lumpy. Always check the stuffing level before sealing it up. A quality repair is not just about looks; it’s about preserving memories. Each ton of thread connects you to happy moments shared with your plush friend. Revisit your skills after a few repairs, and don't hesitate to reflect on where improvements can be made.
Cleaning and restoring plush toys requires careful consideration of materials. Many plush toys are made from synthetic fibers, which can accumulate dirt and odors over time. According to a report from The American Cleaning Institute, 80% of pet owners admit to washing their pets’ toys, indicating a strong awareness of cleanliness in soft items. However, the care advice often varies based on fabric types. Understanding this is critical to avoid damaging your cherished toys.
To clean your plush toys effectively, start by checking the care tag. If the toy is machine washable, use a gentle cycle with cold water. Place the toy inside a pillowcase to minimize wear. Air drying is preferable over tumble drying. This minimizes shrinkage and maintains the softness of the fabric. For toys with stuffing, like those filled with polyester, check for lumps post-wash. Lumpy stuffing can diminish the toy's feel and effectiveness.
In cases where toys lose their fluffiness, consider using a fabric softener. Lightly spritz the plush with a diluted solution of softener and water, then brush gently with a soft-bristled brush. This can help revive the plushiness. Experts suggest that over-washing can strip fibers of their natural oils, leading to a harsher texture. It’s crucial to strike a balance between cleanliness and preservation. A good practice is to wash plush toys only when necessary, ensuring they remain in good condition for years to come.
| Repair Method | Materials Needed | Steps | Tips |
|---|---|---|---|
| Sewing Torn Seams | Needle, Thread | 1. Thread the needle. 2. Identify the torn seam. 3. Sew the seam carefully. | Use matching thread color for a cleaner look. |
| Replacing Stuffing | Polyester Fiberfill | 1. Open a seam. 2. Remove old stuffing. 3. Insert new stuffing. 4. Sew the seam. | Fluff the stuffing evenly to restore shape. |
| Removing Stains | Mild Detergent, Soft Cloth | 1. Mix detergent with water. 2. Dampen cloth. 3. Gently rub the stain. 4. Rinse and air dry. | Test detergent on a small area first. |
| Washing Plush Toys | Washing Machine, Laundry Bag | 1. Place toy in laundry bag. 2. Set machine to gentle cycle. 3. Air dry after washing. | Avoid hot water to prevent damage. |
Repairing damaged plush toys can be a rewarding task. With some creativity, you can breathe new life into your child's favorite stuffed animals. First, gather your supplies. A needle, thread, fabric glue, and scissors will be essential. Choosing matching thread makes your repair less visible.
If you find a tear, try to use a ladder stitch. This stitch is nearly invisible when done correctly. It hides the seams well. For large rips, fabric glue can be helpful. Apply the glue on both edges and hold them together. It’s not always perfect, but with patience, you'll see progress.
Don’t forget to check the stuffing. Over time, it may become lumpy or lose shape. You can easily add new stuffing. This step will help restore the toy's original feel. Sometimes, it may take a few attempts. That’s part of the learning process. Experience builds your skill. Celebrating small victories keeps the process enjoyable.
: You need a sewing kit, stuffing, fabric glue, patches, scissors, and safety pins.
Look for loose seams or tears. Small holes are easier to fix than large ones.
Yes, fabric glue works for quick fixes but may not be perfect.
Use small, even stitches and take your time to secure each one effectively.
Check the stuffing level and add more if necessary before sealing it up.
Yes, repairs can vary. Each imperfection tells a story, reflecting memories shared.
Use a soft brush or lint roller to remove dirt and debris before starting.
Pinch the fabric together and try to adjust. It may require patience and creativity.
Rushing can lead to mistakes. Careful work enhances the toy's sentimental value.
Revisit your techniques after repairs and reflect on what could be done better.
When learning how to repair damaged plush toys, it is essential to gather the necessary materials, such as sewing needles, threads, and fabric glue. Identifying common types of damage, including rips, tears, or loss of softness, is the first step in the repair process.
A step-by-step guide to sewing plush toy repairs can help restore your beloved toys to their former glory. Additionally, cleaning plush toys and restoring their softness is crucial for enhancing their appearance. Creative solutions for fixing rips and tears, such as patching or using embroidery techniques, can also provide unique and personal touches to your repairs. By following these guidelines, you can effectively bring your cherished plush toys back to life.